


Automatically start Colima on Mac
Colima is a great project, based on Lima. Lima mostly stands for "Linux on Mac" (li-ma), so naturally Colima stands for "Containers for Linux on Mac."
Colima can be used as a lightweight drop-in replacement for Docker Desktop, if you're comfortable losing some of the GUI stuff that comes with Docker Desktop.
I use Colima with DDEV, to power all of my LAMP stack development.
But one thing that was really missing was that Colima would not run on startup, so my DDEV containers wouldn't all just work when I did a ddev start. Instead, I'd get a message that it couldn't connect to a docker provider.
Though Colima has no such functionality, it is being worked on (and in fact, Randy Fay from DDEV opened the issue!). But, there's always a way.
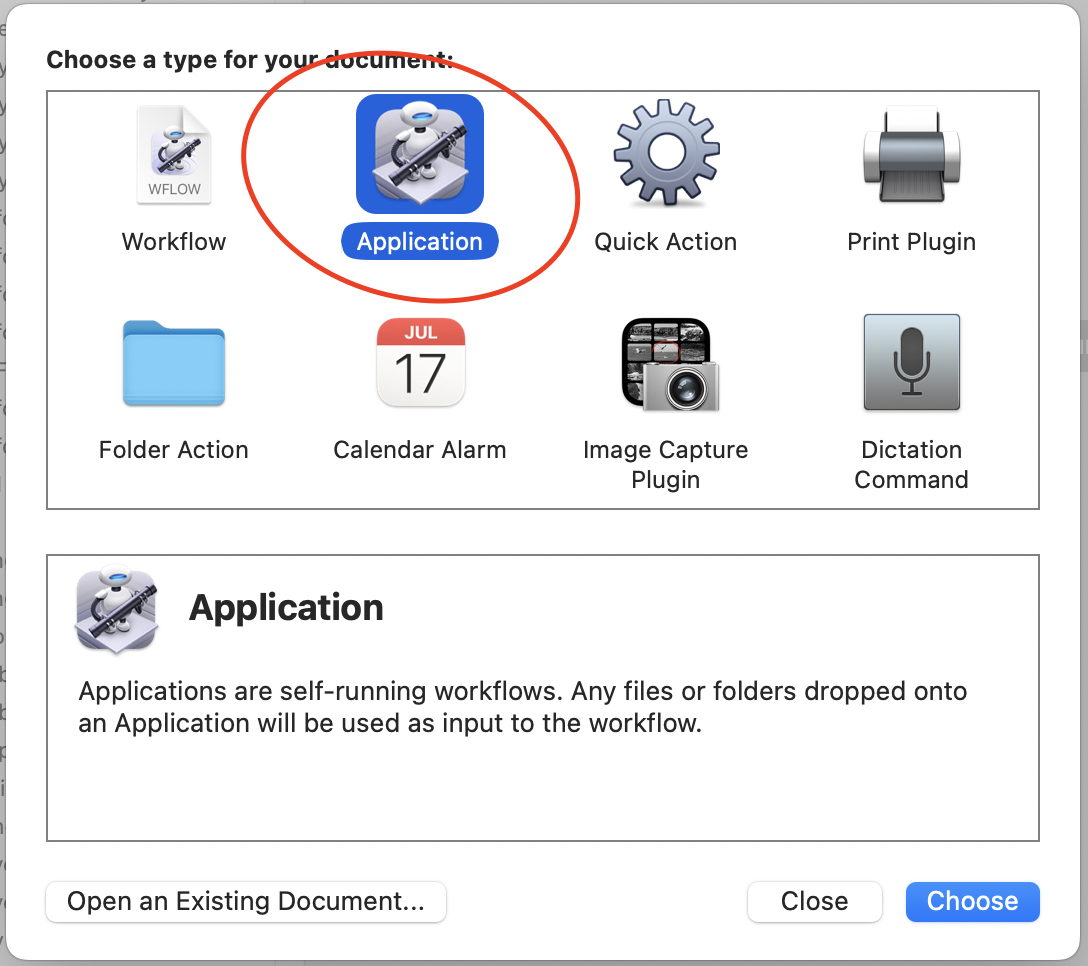
On Mac, you can run Automator scripts on startup if they are created as type "Application."
Inside the application workflow you're creating, simply drag in "Run shell script" as your one action. Change the shell to /bin/zsh if it's not already set that way.
Add the following code to your shell script:
source /Users/<youruser>/.zshrc
/opt/homebrew/bin/colima start
...be sure to of course replace <youruser> with your Mac username. The reason we should source our .zshrc first is to get all of the paths and other information the script needs. Automator scripts will run with no environment, so sourcing the environment makes sure you have a $PATH and any other things that make it feel like it's "running as you" (for example, it looks for some Lima-specific folders in your home folder, but without running the source first, it doesn't know how to find them).
☝ Note that if you're running on an older version of macOS, you may need to change the shell to be /bin/bash and you may need to change the source command to source your ~/.bash_profile instead. I have not tested this, but it makes sense, in theory. 😊
The next command then just starts colima with colima start. Since you've sourced your .zshrc, there's already a path, so colima should start no matter where or how you've installed it.
☝ Another important note here, I have been using Colima while having Docker Desktop installed, so it was using docker and docker-compose commands from there. For this to work, I had to install docker and docker-compose through Homebrew. This was my reminder that I could now uninstall Docker Dekstop and free up 153GB!
Extra Credit: Now run ddev auth ssh
So the icing on this cake for me was to also run ddev auth ssh after Colima started, because that's always the next annoyance/thing I always forget about.
This becomes a little trickier because the ddev auth ssh command itself runs the docker command using "-it" which assumes an interactive TTY exists. Since this Automator script does not have a TTY, the command fails.
No bother. Randy himself told me he works around this in the DDEV tests by using expect.
To do this next part, we need another separate script, and you need expect. Since you're already using Homebrew (right?!), you can just brew install expect to get that binary.
Then, set up this script (I saved mine as ddev-auth-ssh.expect):
#!/usr/bin/env expect -f

set ddevpath [lindex $argv 0];

spawn "$ddevpath" auth ssh
expect "Identity added"
interact
This script expects (ha, ha) to take one parameter, which is the path to ddev. The expect script then spawns that process and counts on seeing "Identity added" (otherwise it will fail). If you save this file and mark it executable (chmod +x ddev-auth-ssh.expect), you can then run it by itself.
Now that that's working, we can add one more line to our Automator script:
/path/to/ddev-auth-ssh.expect `which ddev`
This passes the path to ddev into that script, which lets it run.
☝ Note: be sure to replace /path/to with the actual path to where you saved that script!
Now, whenever my computer starts, Colima starts and I give my keys to the DDEV container!
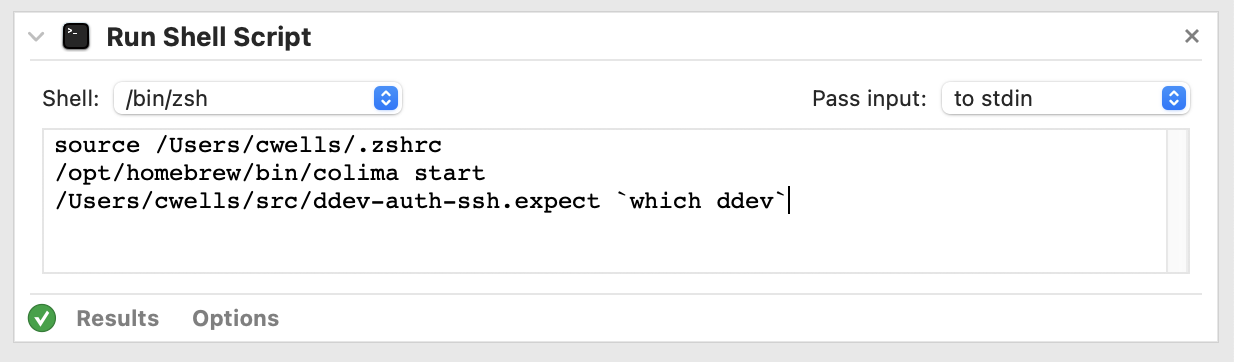 The final Automator application.
The Final Touch
Of course, now don't forget to put your newly saved Automator application into your "Login Items," which you can do from the "Users & Groups" preferences pane.
